What Is Ethanol Shatter?
Ethanol shatter is a translucent, glass-like cannabis concentrate produced through cold ethanol extraction followed by winterization, solvent recovery, and vacuum purging. Unlike BHO (butane honey oil) shatter, ethanol shatter uses food-grade ethanol as the primary solvent — making it a popular choice for processors who want a safer, more accessible extraction workflow without sacrificing quality.
In this guide, we break down the complete 7-step SOP for producing ethanol shatter, based on the bench-top methodology taught by WKU Consulting. Whether you’re running a small bench-top setup or scaling to an industrial operation, this process can be adapted to match your throughput.
Equipment You’ll Need
- Griffin (graduated) beaker
- 5-gallon bucket
- Dry ice
- Food-grade ethanol
- Isopropyl alcohol (for cryogenic bath)
- 20-micron filtration/mesh bag
- Laser temperature gun
- Buchner funnel with vacuum hookup
- Filter papers (10, 5, and 2.5 micron)
- Activated charcoal
- Rotary evaporator (rotovap) with auxiliary chiller
- Vacuum oven with vacuum pump
- Parchment paper and oven trays
If you’re unfamiliar with how solvent selection affects your final product, check out our guide on BHO vs. ethanol extraction and solvent polarity.
Step 1: Prepare the Cryogenic Ethanol Bath
Place your Griffin beaker inside a 5-gallon bucket. Pack dry ice around the beaker (not inside it). Pour your ethanol into the beaker, then add one cap of isopropyl alcohol around the dry ice. The isopropyl creates a chemical reaction that drops the dry ice temperature even further below its natural sublimation point — giving you the ultra-cold ethanol bath needed for a clean extraction.
Quick recap: Beaker in the bucket → ethanol in the beaker → dry ice around the beaker → cap of isopropyl around the dry ice.
Step 2: Soak the Biomass
Load your cannabis or hemp biomass into a 20-micron filtration bag. Using a laser temperature gun, verify that the ethanol has reached -20°C or colder. If it hasn’t, wait longer or add another cap of isopropyl alcohol to the dry ice.
Once at temperature, submerge the filtration bag in the ethanol and agitate for 60 seconds. Dunk, stir, and mix — think of it like dipping a cookie in milk. The filtration bag eliminates the need to filter plant material later, keeping your workflow clean.
Cold contact time is critical. Keeping the soak short (60 seconds) at sub-zero temperatures ensures you’re pulling cannabinoids and terpenes while leaving behind unwanted fats, waxes, and chlorophyll.
Step 3: Squeeze and Recover
Remove the filtration bag and squeeze out as much ethanol as possible. For larger operations, use a centrifuge. Every drop you recover contains valuable cannabinoids, so don’t leave product behind in the biomass.
Step 4: Winterization — The Multi-Stage Freeze-Filter Process
Lab safety is essential during this phase. Winterization removes residual fats, lipids, and waxes through repeated freeze-filter cycles:
- First freeze: Place the beaker in a freezer at -30°C for 12 hours, then filter through a 10-micron Buchner funnel setup.
- Second freeze: Return to the freezer for another 12 hours at -30°C, then filter at 5 microns.
- Third freeze: Freeze for a final 12 hours (36 hours total) at -30°C. This time, filter at 2.5 microns with a bed of activated charcoal (wetted with ethanol) on top of the filter paper for color remediation.
This progressive winterization strategy produces an exceptionally clean crude that’s ready for solvent recovery.
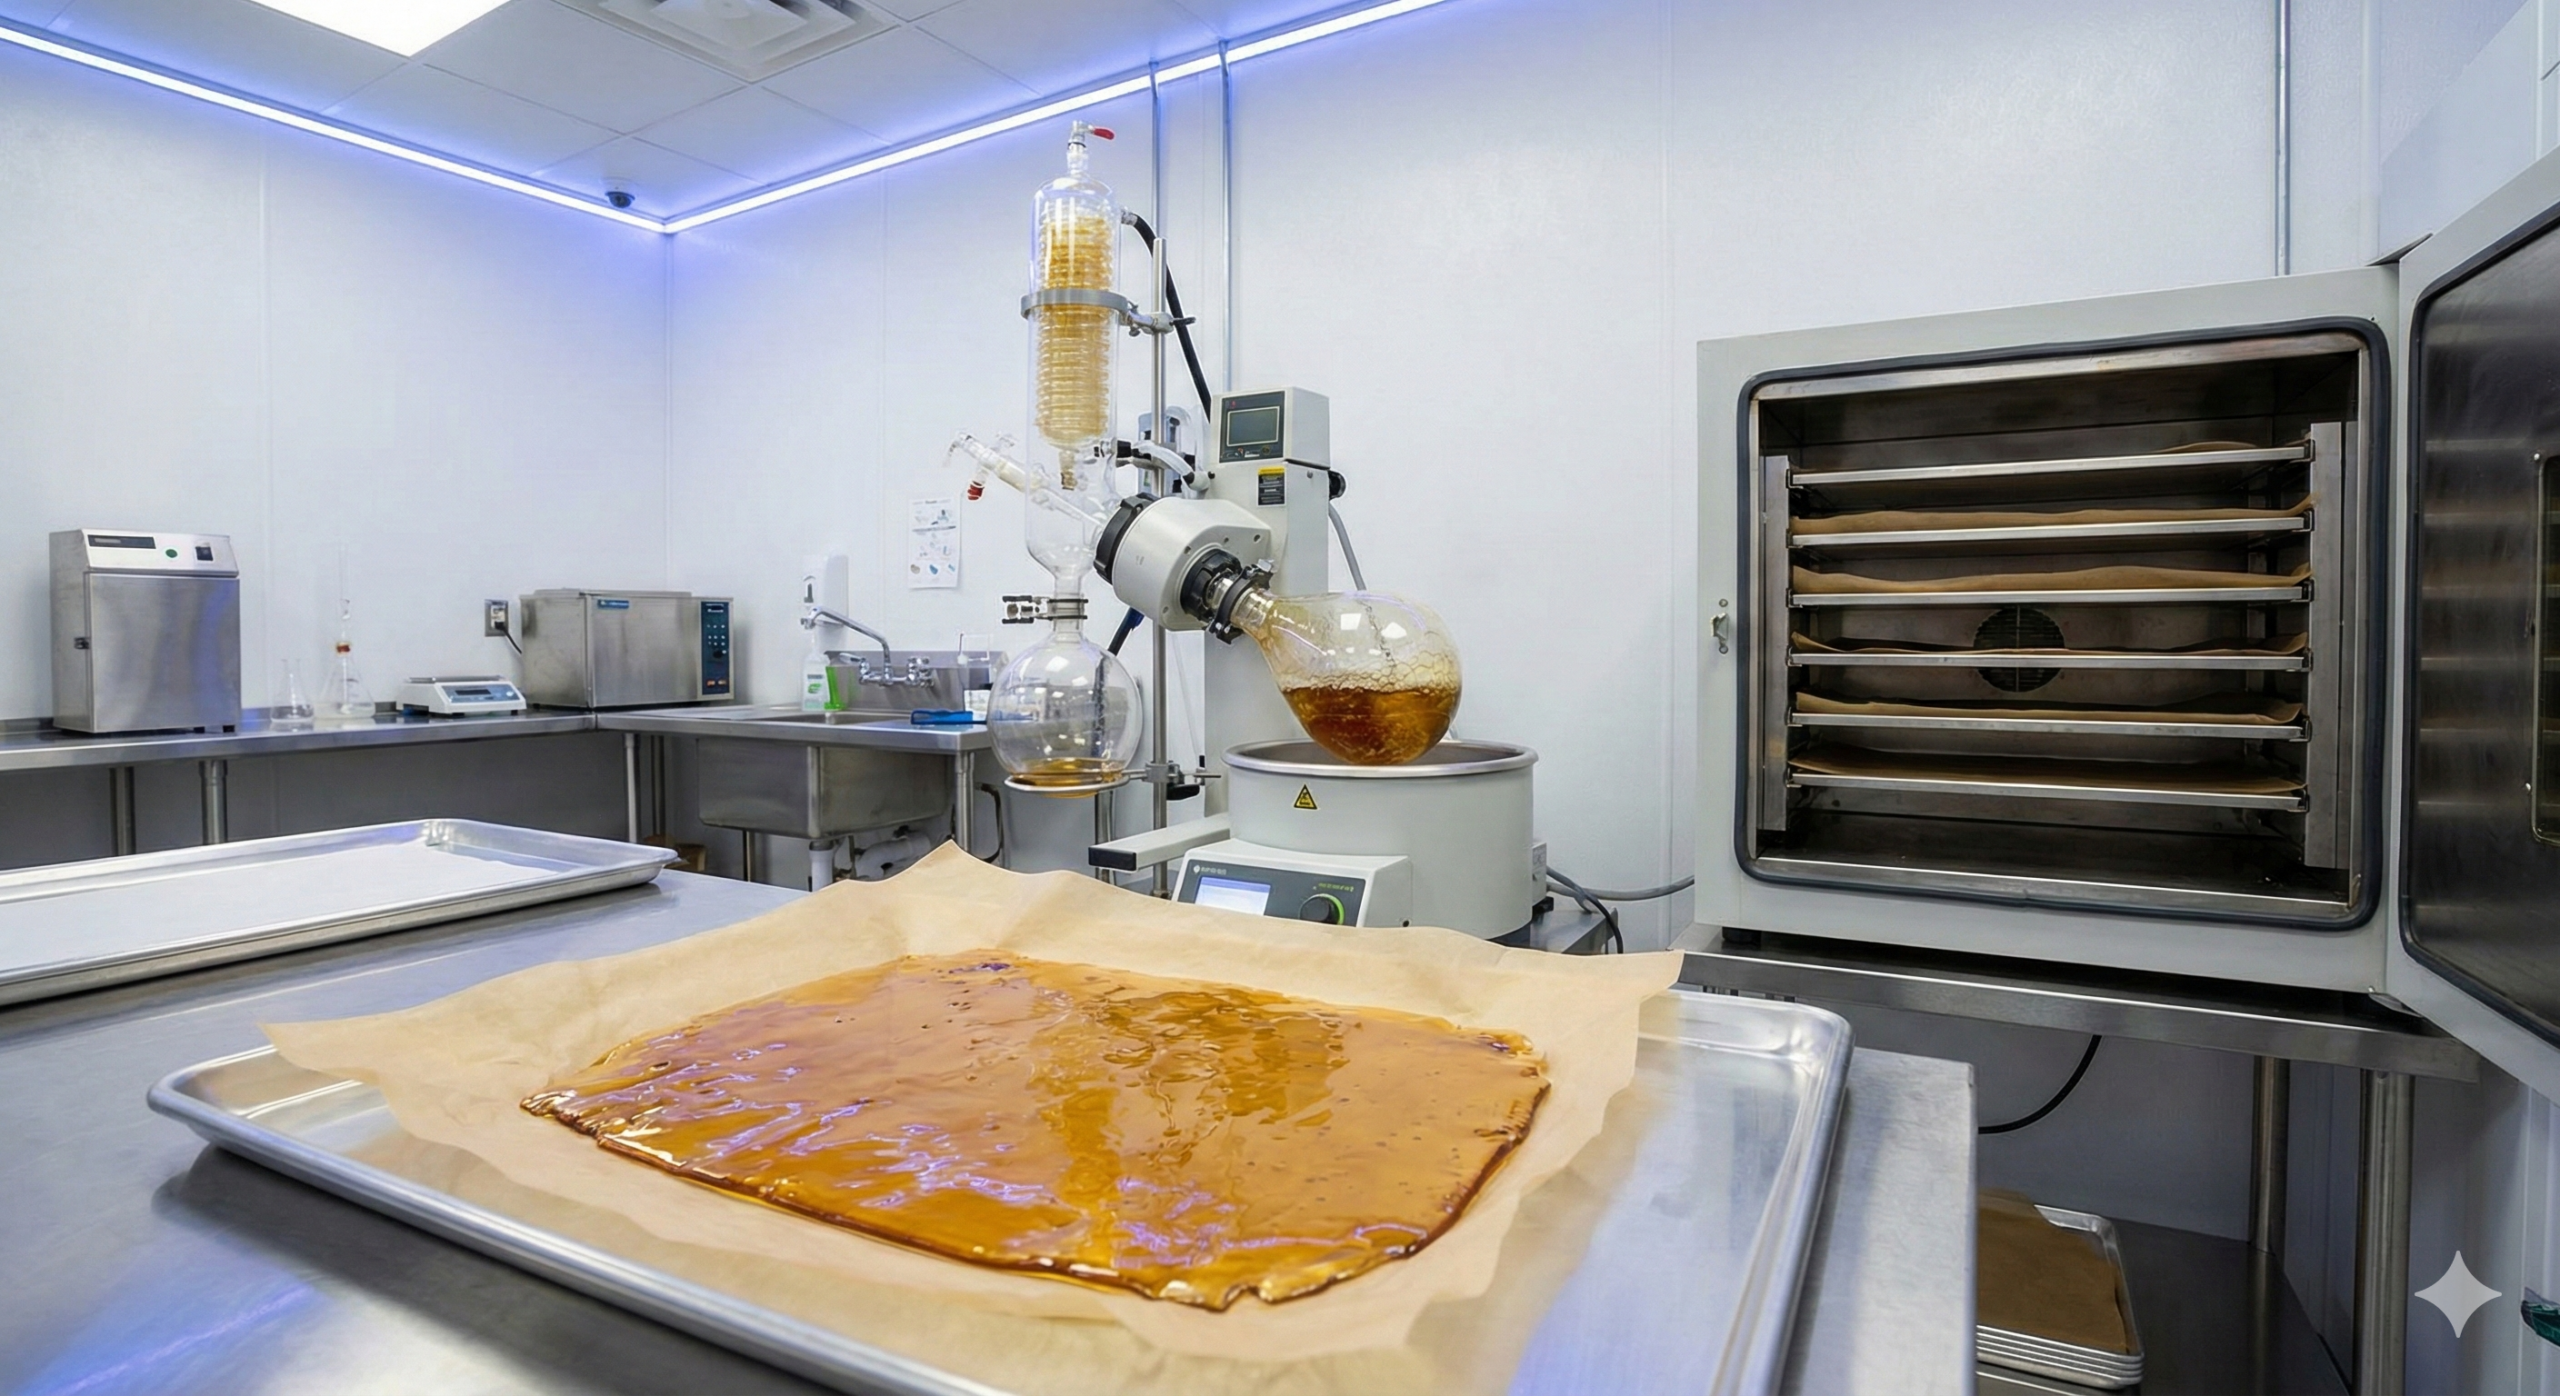
Step 5: Rotovap — Solvent Recovery
Feed the winterized crude into your rotary evaporator and recover the ethanol under vacuum at 30°C. The auxiliary chiller keeps the condensing coils cold enough to recondense ethanol vapor back to liquid for reuse.
Watch for two signs that recovery is nearly complete: the oil starts climbing the walls of the rotating flask, and the drip rate on the condensing coils slows significantly.
While the rotovap is finishing, preheat your vacuum oven to 86°F (30°C) so it’s at temperature before the slab goes in.
If you want to understand how distillation theory applies to solvent recovery and further refinement, we cover that in depth.
Step 6: Pour Onto Parchment and Load the Vacuum Oven
Pour the concentrated oil from the rotovap flask onto a parchment paper boat placed on an oven tray. Learning to fold a proper parchment boat is a key post-production skill — it keeps the slab contained and makes flipping easier.
Slide the tray into the preheated vacuum oven at 86°F and pull the deepest vacuum possible. Be careful on the initial pull — the slab may bubble aggressively, and you don’t want it boiling over the tray.
Step 7: Vacuum Purge Schedule
The purge schedule is where shatter gets its signature glassy texture:
- Day 1: Hold at 86°F under full vacuum for 24 hours. Flip the slab every 12 hours (2 flips total).
- Days 2–4: Raise temperature to 115°F. Continue flipping every 12 hours for 3 additional days (approximately 5 more flips, 7 total across the entire purge).
The low initial temperature prevents the slab from nucleating into a buddery or waxy consistency. Gradually increasing to 115°F drives out residual solvent while preserving the shatter-like structure.
Bench-Top vs. Industrial Scale
Everything in this SOP works at bench-top scale, but every piece of equipment has an industrial equivalent. The 5-gallon bucket becomes a jacketed vessel, the manual squeeze becomes a centrifuge, the benchtop rotovap becomes a 20L or 50L unit, and the small vacuum oven becomes a multi-shelf industrial purging system. The process stays the same — only the throughput changes.
Final Thoughts
Ethanol shatter is one of the most approachable concentrate formats for new processors. The equipment is relatively affordable, ethanol is widely available, and the process is forgiving compared to hydrocarbon extraction. The keys to success are cold temperatures during extraction, thorough winterization, and patient vacuum purging.
Ready to level up your extraction game? Contact WKU Consulting for personalized guidance on building your extraction lab — from bench-top to industrial scale.
For more deep dives into cannabis chemistry, extraction SOPs, and lab design — subscribe to the WKU Consulting YouTube channel. New videos every week covering everything from distillation theory to advanced cannabinoid conversions.
Watch the full video walkthrough: